Customization
Checkly URL
Every public dashboard comes with a configurable custom subdomain under the checkly-dashboards.com domain. By default,
we generate a random ID. You can change this subdomain to anything you like as long as it is unique among all Checkly users.
Typically, a company name works best, e.g. acme.checkly-dashboards.com

Custom Domain
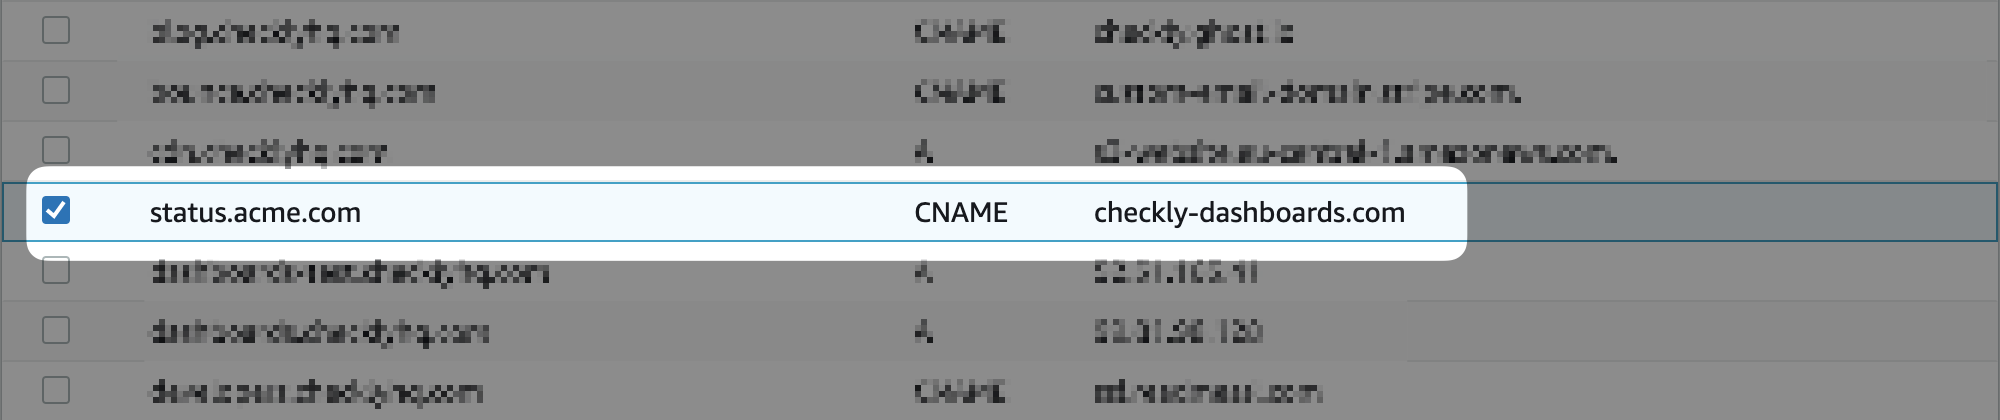
You can host your public dashboard under your own domain. To make this work, you need to do two things:
- Add a valid custom domain to your dashboard setting.

- Create a CNAME record in your DNS that points to checkly-dashboards.com
Any DNS provider will have the option to easily add CNAME records. For example, on AWS Route 53 this looks as follows.
In some cases, our provider will ask you to verify you are the owner of the domain by adding another TXT record to you
your DNS. You will see a notice similar to the one below.

Incidents
You can toggle on/off whether incidents are shown on your public dashboard.
Look & Feel
You can tweak the following parts of your public dashboard:
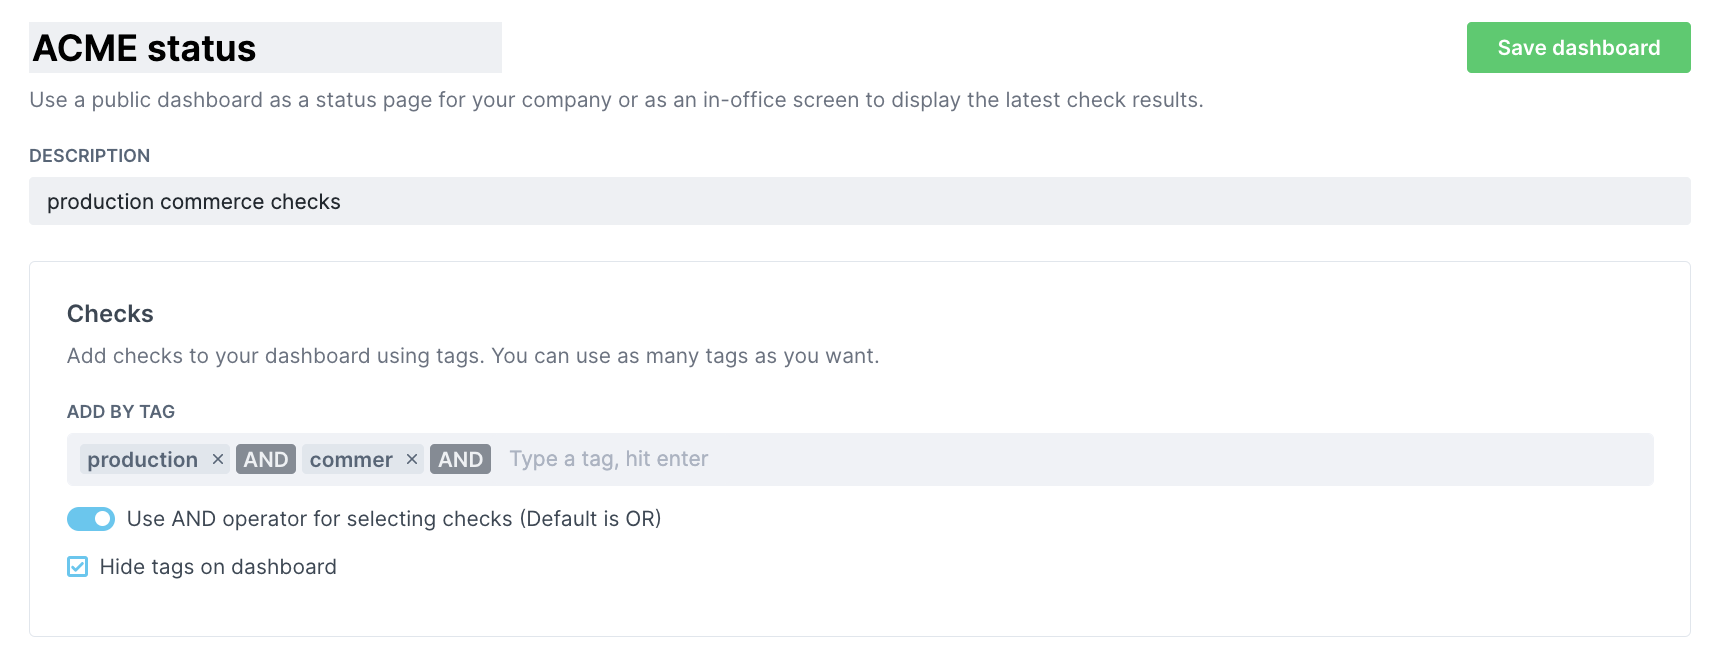
- title: Add a title like “ACME status dash”. This is separate from your Checkly URL or custom domain.
- description: Add a clarifying text to explain visitors what they are looking at.
- checks: Specify the tags of the checks you want to show on the dashboard. By default we show all checks. You can also choose to hide the tags from the dashboard.
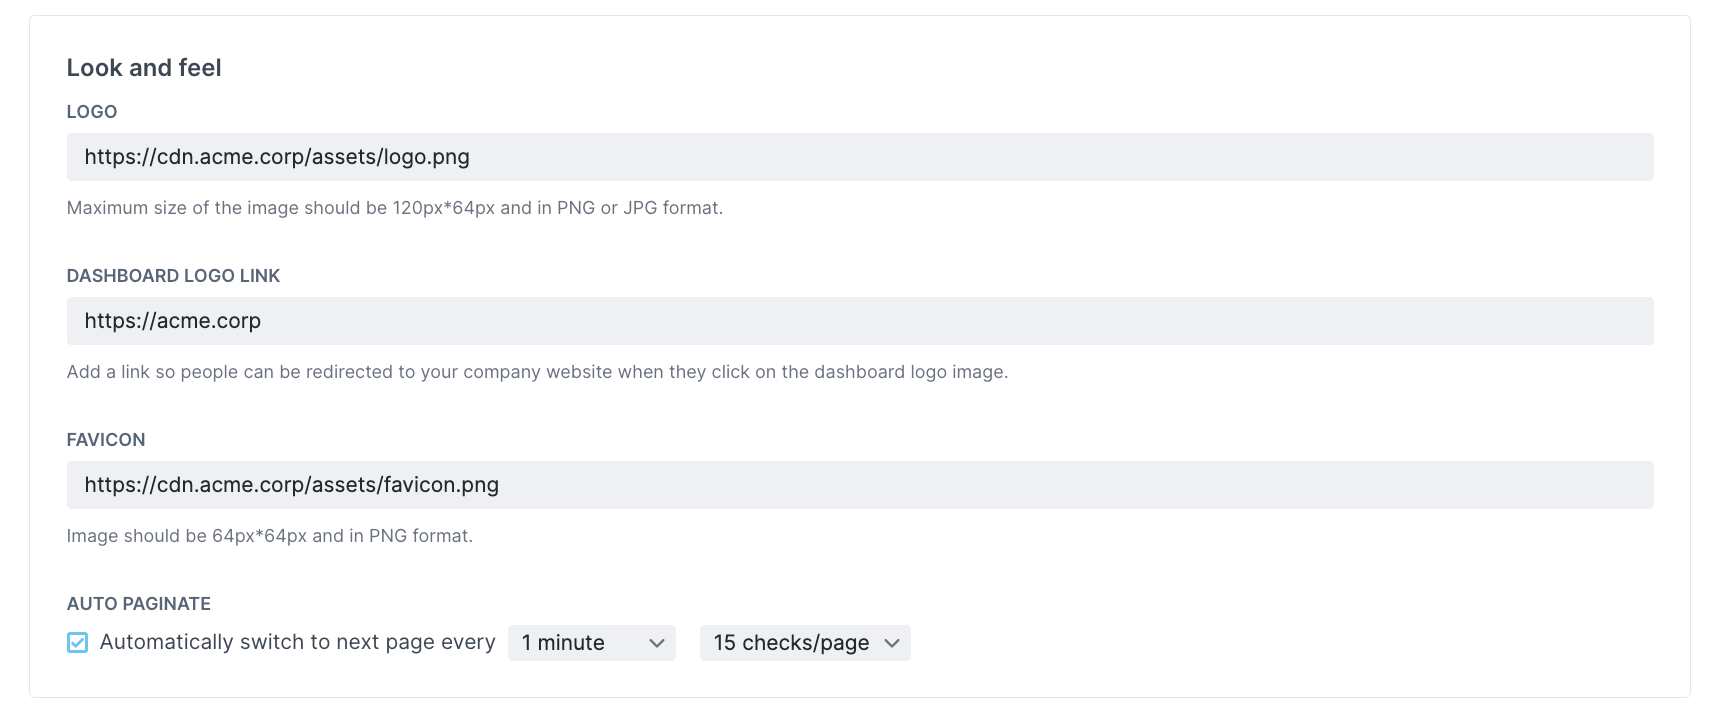
- logo: Display your company logo (or any image) on the top left side of your dashboard.
- logo link: Direct visitors to your company website when they click the logo.
- favicon: Put the cherry on top with a custom favicon.
- auto paginate: Depending on your screen height and amount of checks, we can paginate through them so you have a full overview.
Next to the preset tweaks you can do to your dashboard, you can also apply custom CSS styles.
![]() You can contribute to this documentation by editing this page on Github
You can contribute to this documentation by editing this page on Github