Installing & running the Checkly Agent
About Checkly Agent
You must have the Owner or Admin role on your Checkly account to create private locations.
The Checkly Agent is a container-based tool that enables private locations in Checkly. The agent runs on your infrastructure in a container and runs checks on behalf of the Checkly application. Since the agent is local to your infrastructure, checks can run against any application accessible from the agent via HTTPS or HTTP.
Here are the requirements before you get started:
- The API key received when creating a private location in the Checkly account settings page
- A container runtime (we test using Docker, but other OCI-compliant runtimes should work)
- Outbound internet access to https://agent.checklyhq.com (proxy configuration is supported)
- Access to your internal API- or browser-based application
Redundancy and scaling
At least two agents per private location are recommended for redundancy. When considering scaling, you should use at least N+1 agents per private location to ensure checks will be processed even if an agent fails. Agents are stateless, ephemeral, and scalable. You can add additional agents to a location at any time and remove them as necessary.
If an agent fails, the other agents in the same private location will continue to run the checks assigned to that location. Even checks that are currently in progress on an agent that fails will be rerun by another agent after a timeout period (140s).
There are two cases where checks assigned to a location could fail to run:
- All the agents in the private location have failed
- There is insufficient agent capacity in the private location
Checks will stay queued for 6 minutes waiting for an available agent. If there are no agents available or the available agents are so busy that they cannot process all of the pending checks, the pending checks older than 6 minutes will be lost.
Agents can be scaled up and scaled out. Scaling up means adding additional CPU and memory allocations to existing agent containers. Scaling out means adding additional agent containers.
Scale up
Scaling up of individual agents is generally memory-constrained. For reference, a Browser check requires about 1.5GB of RAM and an API check requires about 150MB. The number of concurrent checks allowed to run on a single agent is controlled by the JOB_CONCURRENCY environment variable which defaults to 1 and can be increased to 10. We do not automatically separate browser and API checks on an agent. If you are running only Browser checks or a combination of browser and API checks in a private location, the formula (rounded down) is:
JOB_CONCURRENCY = Container memory allocation (GB) / 1.5
For example: if your container has 8GB of memory allocated, you should set JOB_CONCURRENCY to 5 (8GB / 1.5GB per check).
If your private location is only running API checks:
JOB_CONCURRENCY = Container memory allocation (GB) / 0.15
For example: if your container has 1GB of memory allocated, you should set JOB_CONCURRENCY to 6 (1GB / 0.15GB per API check). With 1.5GB of memory you can set JOB_CONCURRENCY to the maximum value of 10.
Scale out
To determine the number of agents you need in a private location you first need to know the number of checks assigned to the location and their frequency. API checks can be scheduled as frequently as every 10 seconds and Browser checks as frequently as every 1 minute.
Based on your configuration, you should be able to estimate how many checks will run per minute in your private location.
API checks have a maximum running time of 30 seconds, Browser checks 2 minutes. This means that in the worst case scenario, a checkly agent with a JOB_CONCURRENCY of 1 can run two API checks per minute, or 1 Browser checks per 2 minutes.
In an average configuration this will be higher and API checks are generally faster than Browser checks.
Once you have an idea of how many checks will be running and you know the per-agent JOB_CONCURRENCY limit based on the agent container memory allocation, you can estimate the number of agents required as
agents = ((Checks per minute * average check duration in minutes) / JOB_CONCURRENCY) + 1
- Lower
JOB_CONCURRENCY, more agents. - More checks per minute, more agents.
- Longer average check duration in minutes, more agents. I.e. if your estimate is checks run on average for 30 seconds, you plug in
0.5. - The
+ 1is to ensure redundant capacity in case of rolling upgrades or an agent failure.
Let’s look at an example:
JOB_CONCURRENCY = 4- I expected
35checks per minute - Checks will take on average 25 seconds. This is ~
0,42minutes.
This means my estimated number of agents is ((35 * 0,42) / 4) + 1 = 4,675 or rounded up 5 agents.
Installing and configuring the Checkly agent:
The Checkly agent is a container that runs your checks from within your infrastructure. It needs to be installed in an OCI-compliant container engine such as Docker or Podman.
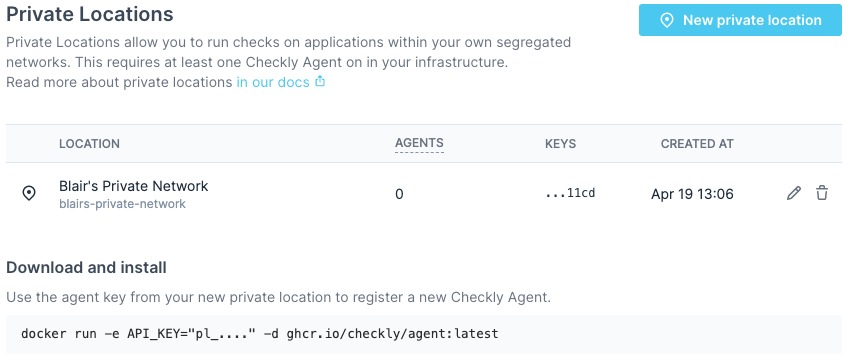
Checkly agents use API keys to associate with private locations. An agent can only associate and run checks for one private location. A private location can have one or two API keys defined to allow for key rotation. This means you can rotate keys on a regular basis for security or in case you lose a key. Keys are only shown once upon creation. After that you can only see the trailing characters to identify the keys.
This guide is specific to the Checkly agent. For information about the overall steps for creating a private location see the getting started guide.
Agent installation steps
- You will have received an API key for the private location when it was created. You can also see the trailing characters for the key in the private locations list to ensure you’re using the correct one. You can also easily copy the
docker runcommand from that page.
- Paste or type the
docker runcommand into your container host. Paste your API key from step 6 between the quotation marks for theAPI_KEYenvironment variable. Optionally, replacedockerwith the command for your container engine of choice (podman, etc.). For example:
docker run -e API_KEY="pl_...." -d ghcr.io/checkly/agent:latest
Note that at this point you can add additional environment variables and startup parameters to the run command. You can also set memory and CPU allocations for the container and other settings (e.g. networking) as needed for your container environment (not shown).
- Optional: Set the
JOB_CONCURRENCYto the appropriate value (1-10) based on your scaling calculations:
-e JOB_CONCURRENCY=10
- Optional: You can configure an HTTPS or HTTP proxy if one is required for your environment. Add an additional environment variable after the
API_KEYlike this:
-e HTTPS_PROXY="https://user:password@127.0.0.1:8080"
-
Run the complete
docker runcommand to start the agent. -
Once the agent container is downloaded and starts up, you can see it in a running state using the appropriate command from your container engine (typically
docker ps).
CONTAINER ID  IMAGE                         COMMAND        CREATED        STATUS            PORTS   NAMES
5c8753a42d05  [ghcr.io/checkly/agent:latest](http://ghcr.io/checkly/agent:latest)  node index.js  2 minutes ago  Up 2 minutes ago          confident_leakey
- You can also check the logs of the new container to ensure it’s up and running (typically
docker logs <container_name>).
[checkly-agent] Starting Consumer c7495186-6f1e-4526-b173-14ee9ad21775
[checkly-agent] No jobs. Waiting..
[checkly-agent] No jobs. Waiting..
[checkly-agent] No jobs. Waiting..
[checkly-agent] No jobs. Waiting..
[checkly-agent] No jobs. Waiting..
-
Start additional agents as required. While a single agent is fine for testing, we recommend running multiple agent containers across several hosts/nodes for redundancy and performance.
-
Refresh the private locations page in the Checkly app and you will see a count of the number of running agents.

Local Docker workflow
You can easily install the Checkly Agent on your Macbook, Windows or Linux machine for local debugging using Docker Desktop. The installation procedure is the same as described above.
To resolve locally running webapps or APIs, e.g. some project running on http://localhost:3000 you need to use the internal
Docker host http://host.docker.internal:3000 to bridge to your localhost address.
Updating the agent container
Since the agents are stateless, they can be updated by replacing them or updating the image in place. If you don’t have an existing process for upgrading containers, an in-place upgrade is easiest as it keeps the previously defined environment variables.
You can use the Watchtower tool to do an in-place upgrade of an agent container. Ensure you have sufficient agent capacity as the agent container will have a short outage as it is upgraded. As agent shutdowns are graceful, no running checks will be lost:
docker run --rm -v /var/run/docker.sock:/var/run/docker.sock containrrr/watchtower --run-once <container-name-to-be-updated>
Rotating API keys
API keys can be rotated as necessary in order to maintain good security practices or in case a key is lost or compromised. A private location can have two active API keys. To rotate the API keys:
-
Navigate to Private Locations in your Account Settings.
-
Click the edit icon on the private location you want to update.
-
There will only be a single API key in place on a new private location. Click Add new API key to add the second key.
-
The new API key will appear. Click the copy icon to copy it to your clipboard and save it somewhere secure.
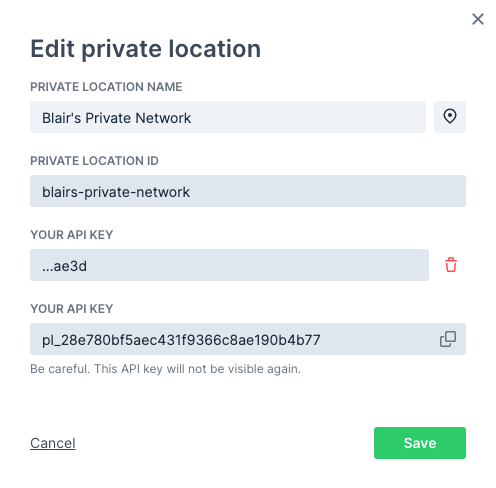
- Click Save to close the dialog. You can now see the trailing characters of the two defined API keys in the list of private locations.

- You now need to replace your Checkly agents. You can do this one-by-one or as a group, just make sure you always have enough agent containers up and running based on your workload. Using your container management tool, start new agents with the new API key:
docker run -e API_KEY="pl_...." -d ghcr.io/checkly/agent:latest
- Make sure the new agents are running properly. You can check the agent count in the Private Locations page in Account Settings, or check your container logs. Remove the old agent containers:
docker stop <old container name or ID>
If you lose track of which agent containers are using the old API key, you can use the docker inspect <container name or ID> command and look for the API_KEY variable in the output.
-
Now that your new agents are in place, remove the old API key. Click the edit icon in the private location again.
-
Click the delete icon next to the old API key (verified by the shown trailing characters) then click the confirmation.
-
Click Save to close the dialog. You will now only see the new API key listed for the private location.
Trusing Enterprise TLS Certificates
Some enterprise environments may use internal certificates for TLS connections. These certificates need to be trusted by the agent; otherwise, the agent’s TLS connection to the Checkly platform will fail.
To configure the agent to trust the certificate, first copy the certificate as a PEM file onto the host. The Docker run command should then be updated to mount the certificate as a volume and pass the path to the certificate in the NODE_EXTRA_CA_CERTS environment variable. For a certificate stored at the path ~/certificate.pem, the Docker run command will be:
docker run -v ~/certificate.pem:/checkly/certificate.pem -e NODE_EXTRA_CA_CERTS=/checkly/certificate.pem -e API_KEY="pl_...." -d ghcr.io/checkly/agent:latest
Checkly Agent environment variables
Checkly agent has several environment variables that can be configured:
| Environment Variable | Description |
|---|---|
API_KEY |
API key for the private location in which the agent will serve. The API key is shown in the web app once, when initially creating a private location. |
HTTPS_PROXY |
HTTPS proxy configuration for the outbound connection to the Checkly API, used for agent management and monitoring. https://user:password@127.0.0.1:8080 |
HTTP_PROXY |
HTTP proxy configuration for the outbound connection to the Checkly API, used for agent management and monitoring. Used if the proxy server does not accept HTTPS connections. http://user:password@127.0.0.1:8080 |
JOB_CONCURRENCY |
(Default: 1, max: 10) Number of concurrent checks that are run by the agent. |
Examples
![]() You can contribute to this documentation by editing this page on Github
You can contribute to this documentation by editing this page on Github